Copy Screen to Clipboard *
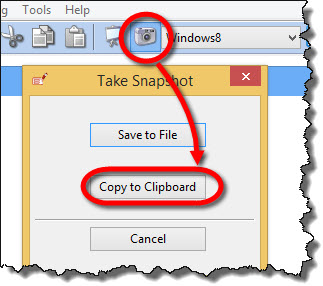
To take a snapshot of the screen you are working on and copy it to clipboard:
- Click on “Capture Snapshot” command on the top toolbar.
- Choose “Copy to Clipboard”.

Save Snapshot to File *
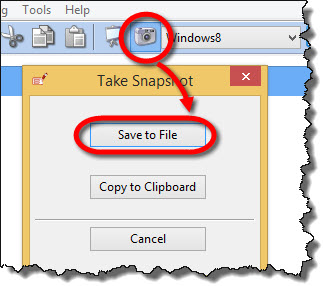
To take a snapshot of the screen you are working on and save it to file:
- Click on “Capture Snapshot” command on the top toolbar.
- Choose “Save to File”.

Image Export Options *
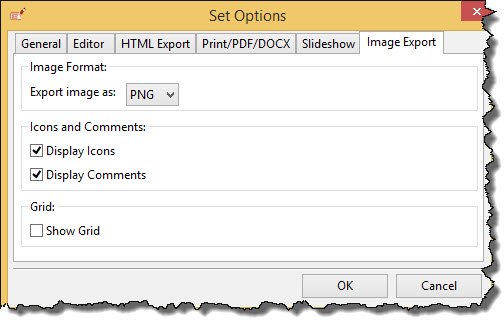
To find the Image export options:
- Click on “Options” command on the top toolbar.
- Choose the “Image Export” tab.
Available options are:
- Export image as – Choose the image format that will be default for image exports.
- Display icons – Whether or not to display icons on images.
- Display comments – Whether or not to display comments on images.
- Show grid – Whether or not to display grid on images.

Available Image Formats *
For all image exports, you can choose among:
- .jpg
- .png
- .bmp
- .gif
Export Whole Project as Images *
To export all the screens in a project as separate images:
- Go to File / Export / Export Images.
- Choose “Export Whole Project”.