By exporting your project, you get:
- A way to share and discuss your mockups.
- A quick specification you can share with your team and further build upon.
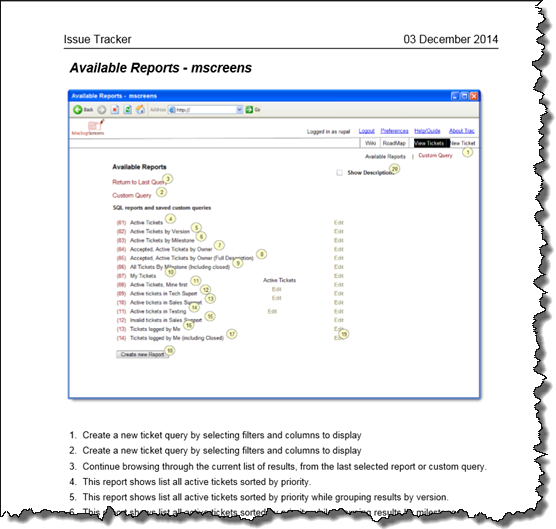
Each screen is exported along with all its annotations:
At the moment, available export formats are:
- Microsoft Word document – De-facto standard for corporate collaboration.
- PDF document – You can email a PDF to anyone and be sure they can open it. Disadvantage compared to Word is that an exported PDF is read-only.
- HTML – A folder with pages and images. Advantage of HTML is that links work within HTML export.
- Single-page HTML – Same as HTML, but in a single file, which is more practical for most purposes.
Export to Word *
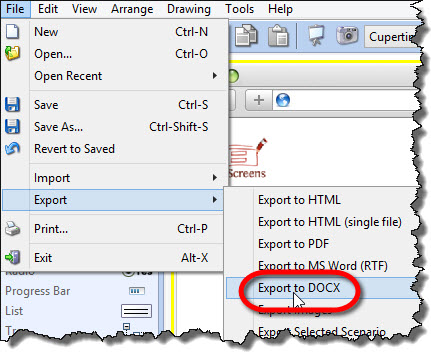
To export your project to MS Word in .docx format:
- Choose Export / Export to DOCX from the “File” menu:
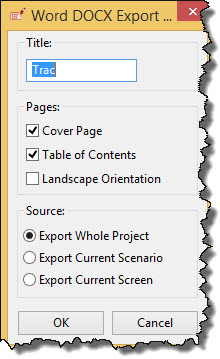
When creating a Word export, you can set the following options:
- Cover page – Create cover page or not.
- Table of Contents – Create table of contents or not.
- Landscape orientation – To present your mockups in greater detail, you can export them in a landscape mode.
- Source – What will be exported: a whole project, current scenario, or a current screen.
Defaults and more options (for example, whether to display annotations or not) can be set on:
- “Print / PDF / DOCX” tab via Tools / Options (on Mac, it’s MockupScreens / Preferences).
Generate PDF *
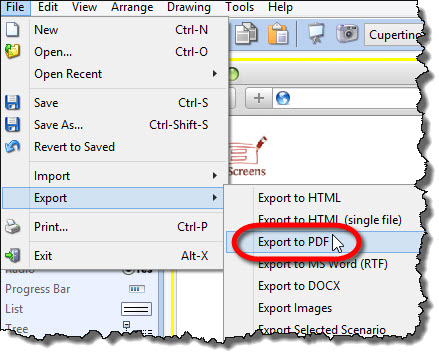
To export your project as a PDF document:
- Choose Export / Export to PDF from the “File” Menu:
When creating a PDF document, you can set the following:
- Cover page – Create cover page or not.
- Table of Contents – Create table of contents or not.
- Landscape orientation – To present your mockups in greater detail, you can export them in a landscape mode.
- Source – What will be exported: a whole project, current scenario, or a current screen.
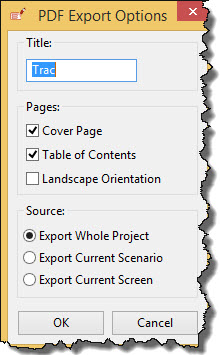
Defaults and more options (for example, whether to display annotations or not) can be set on:
- “Print / PDF / DOCX” tab via Tools / Options (on Mac, it’s MockupScreens / Preferences).
Generate HTML *
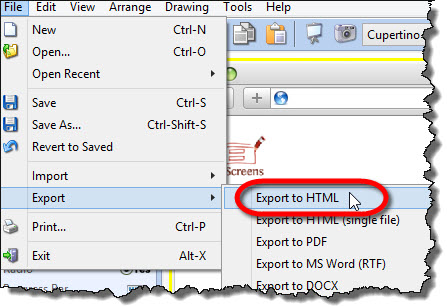
To generate HTML export:
- Choose Export / Export to HTML from the “File” menu:
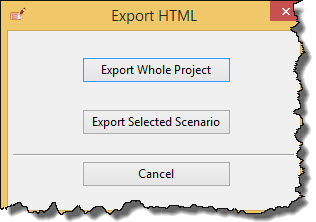
Then you can choose whether to export a whole project or the current scenario:
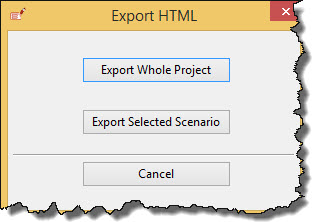
Defaults and more options (for example, which image format to use) can be set on:
- “HTML Export” tab via Tools / Options (on Mac, it’s MockupScreens / Preferences).
Generate Single-Page HTML *
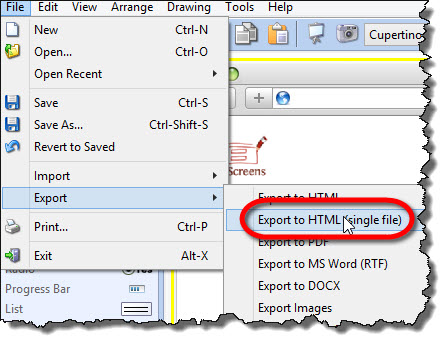
To generate single-page HTML export:
- Choose “Export / Export to HTML (single file)” from the “File” menu:
Then you can choose whether to export a whole project or the current scenario:
Defaults and more options (for example, which image format to use) can be set on:
- “HTML Export” tab via Tools / Options (on Mac, it’s MockupScreens / Preferences).
Document export options *
To set defaults and advanced options for document exports:
- Open Tools / Options (on Mac it’s MockupScreens / Preferences).
- Open Print / PDF / DOCX tab:
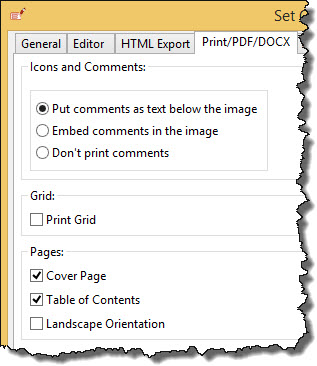
- Icons and Comments – You can display comments as text bullets below the screen image, or as a part of the screen itself, or omit comments completely.
- Grid – Whether or not grid will be displayed on screen images in your exports.
- Cover Page – Whether or not to create cover page.
- Table of Contents – Whether or not to create table of contents.
- Landscape Orientation – If this checkbox is turned on, exported (or printed) documents will be created in landscape. This gives much more space for images, so they can be presented in greater detail.
HTML Export Options *
To set defaults and advanced options for HTML exports:
- Open Tools / Options (on Mac, it’s MockupScreens / Preferences).
- Open Html Export tab:
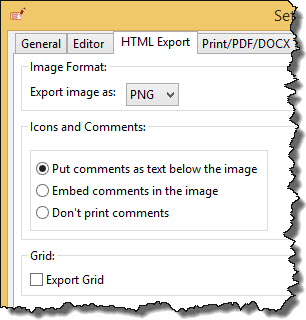
- Image Format – Which image format to use in HTML exports. Available image formats are jpg, gif, png, and bmp.
- Icons and Comments – You can display comments as text bullets below the screen image, or as a part of the screen itself, or omit comments completely.
- Grid – Whether grid will be displayed or not on screen images in your exports.